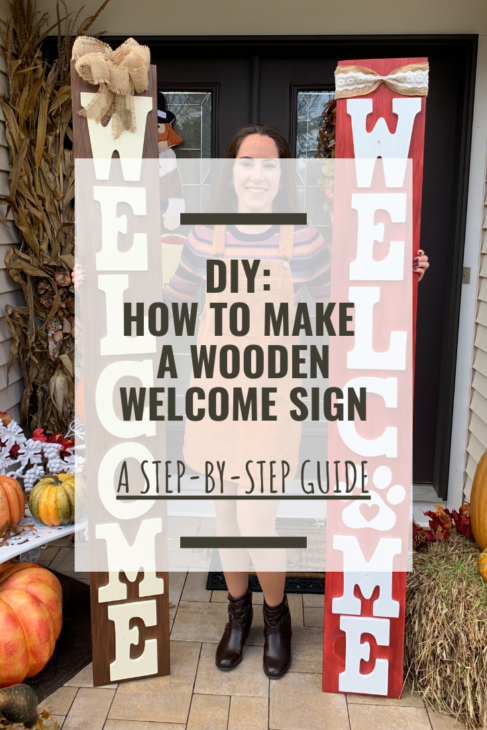
DIY WOODEN WELCOME SIGNS
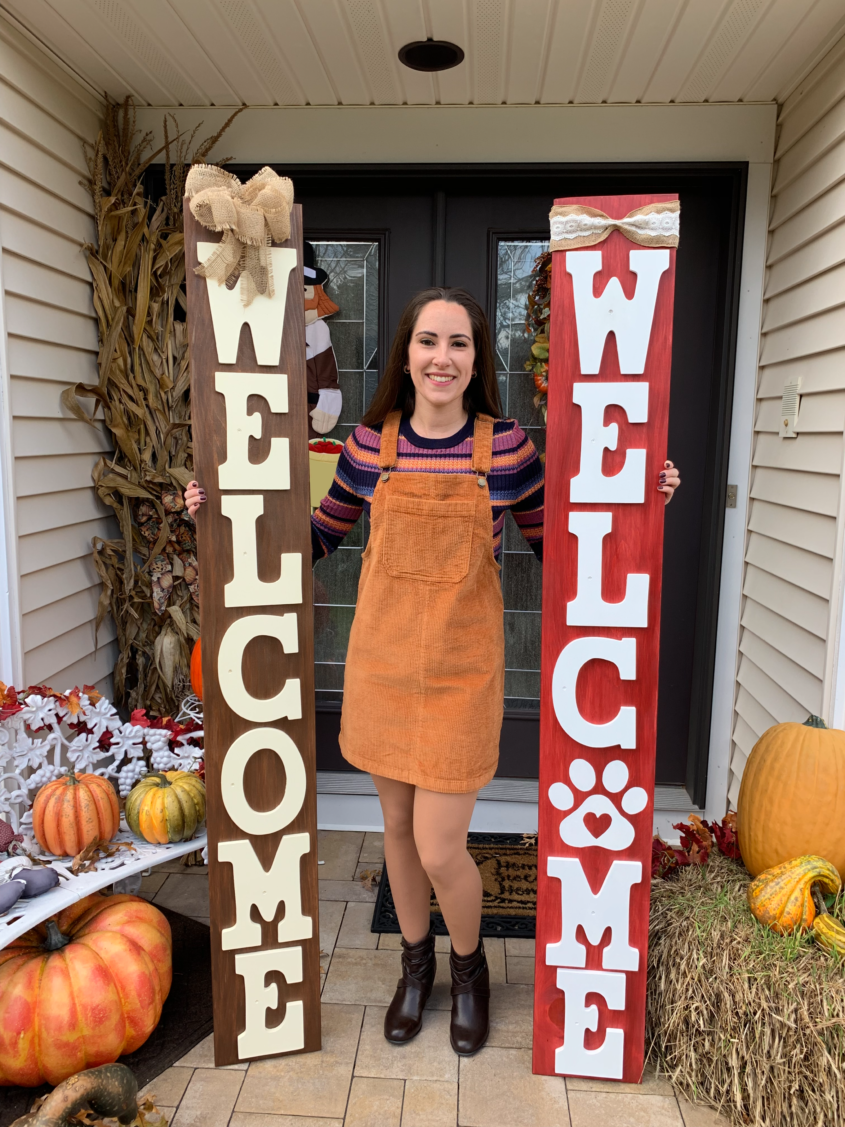
I’ve been feeling crafty lately, so I decided to take on a project. Since wooden welcome signs seem to be a popular decoration trend, I took a shot at it. I made two to give as gifts and I’m really happy with the way they turned out!
Below is a step-by-step guide on how I created them. Every step can be altered based on preference. I only decorated one side of the wood, but I’ve seen other examples of both sides decorated with different themes and sayings.
SUPPLIES
- Wood board
- Sand paper
- Paint
- Paint brushes
- Paint pen
- Letters
- Wood glue
- Screws
- Rust-Oleum topcoat spray
- Decorations (burlap ribbon, artificial flowers, etc.)
*I found all my supplies at Michaels and Lowes.
STEP-BY-STEP INSTRUCTIONS
Step One: Smooth the Edges
Sand all sides and edges of the wood to ensure a smooth surface.
Step Two: Paint!
Choose a background color and paint the wood in it’s entirety (front, back, sides). If you want the grain of the wood to show, use a wash technique. The paint also goes on smoothly and doesn’t leave brush stroke marks. There are different ways to use this technique; I soaked the brush in water, dipped it into a small amount of paint, and then painted it on the board.
Next, paint the letters. I didn’t use the wash technique because I wanted them to be bold and stand out. I bought 3D letters, but you can also paint the letters right on the board.
*Paw print: For one of my signs, I replaced the letter “O” with a paw print. It was actually easier than I expected. I printed a design I liked, cut it out, and then traced it in pencil on the board. Next, I traced the outline with a paint pen, and then used a paint brush and regular paint to fill it in. I painted on multiple coats to ensure the background color wouldn’t show through.
Step Three: Secure the Letters
Use wood glue to place the letters and screw them in to secure them further. I touched up the paint after screwing them in. You can also fill the holes with putty.
Step Four: Prepare for the Outdoors
For signs being placed outside, spray a protective topcoat on it. Make sure it’s for the outdoors and spray multiple coats. I used a Rust-oleum clear durable topcoat with a semi-gloss finish.
Step Five: Design your Sign
Add a decoration to spruce up the sign. I formed different burlap ribbon into bows for the top of mine.
*If your decorations are painted or need to be protected from outdoor elements, they should be put on before spraying the protective topcoat.
Step Six: Put it on Display
Find a place for your sign and welcome in your guests!
Overall, making the signs was a fun process. I recommend it to anyone who wants one for themselves or wants to give one as a gift. Leave a comment below if you have any questions!
Shoutout to my Dad, Mom, and Grandma for helping out with some elements!

PIN THIS POST